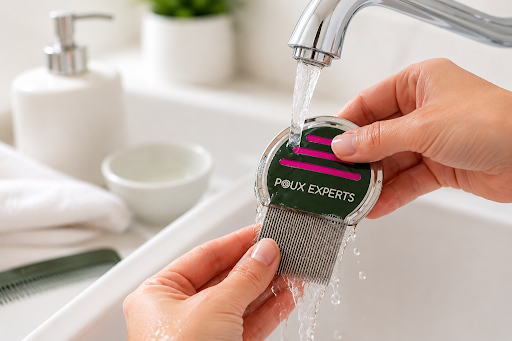
A nit comb should be cleaned after every use. Whether you’ve used it to remove head lice, check your child’s hair after a school notification, or carry out a routine inspection, cleaning the comb before storing it helps keep it effective for the next use.
During combing, hair, scalp oils, skin flakes, and debris can build up between the teeth of the comb. If you’ve been treating an active infestation, trapped lice or viable nits may also remain lodged in the teeth. While cleaning a nit comb alone won’t prevent future infestations, using a clean comb makes inspections easier, helps the comb perform as intended, and supports good hygiene.
This guide explains how often to clean a nit comb, the best way to clean and disinfect it, common mistakes to avoid, and how proper care can help extend the life of your comb.
Key Takeaways
- Clean your nit comb after every use, whether for lice treatment or routine hair checks .
- Removing trapped lice, nits, hair, oils, and debris helps the comb work more effectively.
- During active lice removal, clean the comb regularly throughout the combing session to keep the teeth clear.
- Wash the comb with warm water and mild soap, then dry it thoroughly before storing it.
- Check your comb regularly for bent or damaged teeth, as this can reduce its effectiveness.
- Proper cleaning helps extend the life of a quality metal nit comb.
Why Cleaning a Nit Comb Matters
A professional nit comb is designed with closely spaced teeth to catch and remove live lice and firmly attached nits. As the comb passes through the hair, it also collects oils, scalp flakes, loose hairs, conditioner, and other debris that can build up between the teeth.
Over time, this build-up can make the comb more difficult to use and reduce its ability to glide smoothly through the hair. If you’ve been combing hair with an active infestation, trapped lice or viable nits may also remain lodged between the teeth if the comb isn’t cleaned thoroughly.
Cleaning the comb after each use doesn’t guarantee that head lice won’t return, as reinfestation usually happens through new exposure or missed viable nits. However, it helps keep your head lice comb clean, hygienic, and ready for your next inspection or treatment session.
How Often Should You Clean a Nit Comb?
The answer is simple: clean the comb after every single use.
Whether you’re removing head lice, carrying a routine weekly hair check, or checking your child’s hair after a school notification, your nit comb should be cleaned before it’s put away.
Cleaning the lice comb immediately prevents dried residue from becoming more difficult to remove. It also ensures the comb is ready whenever you need it again .
When You Use the Nit Comb | Recommended Cleaning |
During active lice removal | Clean after every combing session. |
After checking your child’s hair | Clean immediately after the inspection. |
Weekly preventive hair checks | Clean after every use. |
Before using the same comb on another family member | Clean and dry the comb thoroughly before using it again. |
Before long-term storage | Wash, dry thoroughly, and store in a clean, dry place. |
Many parents assume rinsing a comb underwater is enough. In reality, trapped residue can remain between the teeth , particularly after removing head lice or nits. Taking a few extra minutes to clean your lice comb properly helps maintain its performance and extends its lifespan.
What Can Happen If You Don’t Clean Your Nit Comb?
A dirty nit comb won’t automatically cause a new head lice infestation, but it can make your comb less effective and more difficult to use.
Over time, hair, oils, conditioner, and other debris can build up between the teeth, making it harder for the comb to glide through the hair and catch live lice and firmly attached nits.
If you’ve been combing hair with an active infestation, trapped lice or viable nits may also remain inside the comb if it isn’t cleaned thoroughly after use.
Common problems include:
- Reduced combing performance
- Hair and debris trapped between the teeth
- Greater difficulty removing live lice and nits
- Shorter lifespan of the comb
- Poor hygiene if the comb is used again without cleaning
- Increased risk of cross-contamination if family members share the comb
Cleaning your nit comb after every use helps keep it effective, hygienic, and ready for the next inspection or treatment session.
Need Help Getting Rid of Head Lice?
Cleaning your nit comb is important, but effective lice removal requires the right approach. Book professional lice removal today for thorough, expert care.
How to Clean a Nit Comb Properly
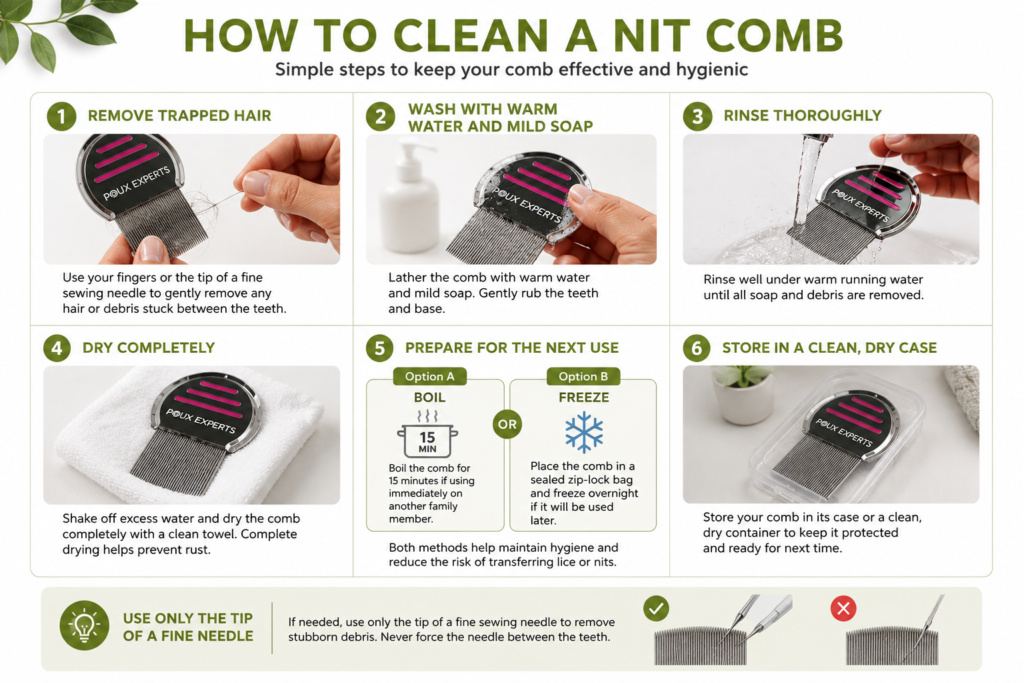
Cleaning a nit comb properly only takes a few minutes and helps keep it effective for future hair checks or head lice removal. Whether you’ve been removing live lice, checking your child’s hair, or carrying out a routine inspection, cleaning the comb after use should become part of your routine.
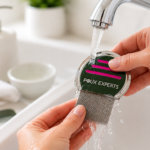
Step 1: Remove Hair and Visible Debris
Carefully remove any hair caught between the teeth of the comb using your fingers, a tissue, or a towel. This helps expose any remaining residue trapped between the teeth.
Step 2: Wash with Warm Water and Mild Soap
Wash the comb using warm water and mild soap or gentle detergent.
Use a soft brush, such as an old toothbrush, to clean thoroughly between the metal teeth and remove any remaining oils, conditioner, or debris.
Step 3: Rinse Thoroughly
Rinse away all soap residue under clean running water. Check that nothing remains trapped between the teeth before drying.
Tip: If a stubborn nit or debris remains lodged between the teeth, you can carefully use the tip of a fine sewing needle to loosen it. Avoid inserting the needle fully between the teeth, as this may widen the gap and reduce the comb’s effectiveness.
Step 4: Allow the Comb to Dry Completely
Pat the comb dry with a clean towel and allow it to air dry completely before storing it. Storing a damp comb may encourage unnecessary moisture build-up.
Tip: If the person being treated has any open cuts or sores on the scalp, disinfect the nit comb with 70% isopropyl alcohol after cleaning, especially if it will be used on another family member. Allow the alcohol to evaporate completely before using the comb again
Step 5: Prepare the Comb for Its Next Use
If you’ll be using the same comb on another family member immediately after cleaning, you can place the comb in boiling water for 15 minutes, then allow it to cool completely before use.
If the comb won’t be needed again until another day, another option is to place the clean, dry comb in a sealed zip-lock bag and leave it in the freezer overnight before storing it.
Step 6: Store in a Clean, Dry Place
Once the comb is completely dry and, if needed, disinfected, store it in a clean, dry container or protective case. Keeping the teeth protected helps prevent them from bending or becoming damaged between uses.
Don’t Let Head Lice Keep Coming Back
From proper nit comb cleaning to complete lice removal, get professional help to tackle lice and nits effectively. Contact us today.
Common Mistakes Parents Make When Cleaning a Nit Comb
Even parents who clean their comb regularly can make small mistakes that reduce its effectiveness or hygiene. Avoiding these common mistakes helps keep the comb ready for future hair checks and head lice removal.
Only Rinsing with Water
Rinsing with water alone may remove loose debris, but it often won’t remove oils, conditioner, or residue trapped between the teeth. Washing the comb with warm water and mild soap provides a more thorough clean.
Forgetting to Clean the Comb During Combing
During active lice removal, pause occasionally to wipe the comb clean. Removing trapped hair, lice, and debris between passes helps the comb continue working effectively throughout the session.
Using the Same Combs without Preparing It
If you’re using the same nit comb on another family member, clean it thoroughly first. If it needs to be reused immediately, boil it for 15 minutes. If it won’t be needed until another day, place the clean, dry comb in a sealed zip-lock bag and leave it in the freezer overnight before storing it.
Storing the comb while still damp
Always allow the comb to dry completely before storing it. Storing a damp comb can leave moisture trapped around the teeth and reduce overall hygiene.
Ignoring Bent or Damaged Teeth
Inspect your comb regularly. Bent, loose, or damaged teeth can make it more difficult to remove live lice and firmly attached nits effectively. Replacing a worn comb helps maintain the best performance.
When Should You Replace Your Nit Comb?
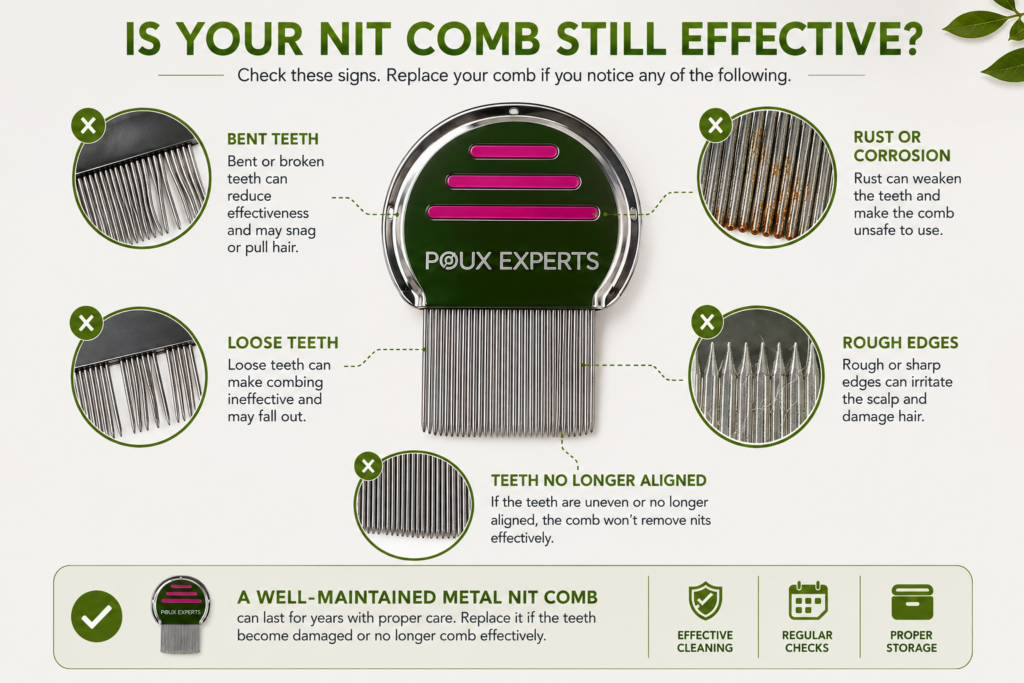
A quality metal nit comb can be reused many times if it’s cleaned, dried, and stored properly. However, like any tool, it should be inspected regularly for signs of wear.
Even if the comb looks clean, damaged or misaligned teeth can make it more difficult to remove live lice and firmly attached nits effectively.
Watch for these signs:
- Teeth that are bent or no longer evenly aligned.
- Loose or damaged metal teeth.
- Rust or corrosion
- Rough edges that catch or pull the hair
- Reduced performance when combing through the hair.
If you notice any of these problems, replacing the comb is usually more effective than continuing to use one that has become damaged.
Condition | Recommendation |
Teeth remain straight and aligned | Continue using |
Minor residue | Clean thoroughly and inspect before reuse. |
Bent or loose or missing teeth | Replace the comb |
Rust or corrosion | Replace the comb |
A well-maintained nit comb is one of the most important tools for effective head lice inspections and manual nit removal.
How to Help Your Nit Comb Last Longer
A few simple habits can help extend the life of your comb:
- Clean it thoroughly after every use.
- Remove stubborn debris carefully without forcing objects between the teeth.
- Dry it completely before storing.
- Store it in a clean, dry container or protective case.
- Avoid dropping or bending the comb.
With proper care, a quality metal nit comb can be reused for many hair inspections and lice removal sessions.
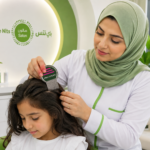
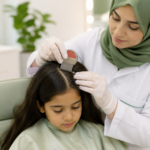
If you’re looking for a professional-quality metal nit comb, we use and recommend the Poux Experts Comb during our head lice removal appointments. Its closely spaced stainless steel teeth are designed to help remove live lice and firmly attached nits effectively. The same comb is also available to purchase for families who want a reliable comb for home hair checks and nit removal.
Professional Lice Removal, Wherever You Need It
Skip the stress of repeated combing and cleaning. Get convenient professional lice removal at home with expert support from start to finish.
Frequently Asked Questions
Can I use the same nit comb for everyone in the family?
We recommend that each family member has their own nit comb whenever possible. If the same comb needs to be shared, clean it thoroughly after each use and follow the recommended sanitising steps before using it on another family member.
Should I clean the nit comb during the combing session?
During active lice removal, wiping or rinsing the comb between passes helps remove collected hair, lice, and debris so it continues to work effectively throughout the session.
How can I tell if the white specks in my child’s hair are nits?
Nits are small, oval eggs that are firmly attached to individual hairs, usually close to the scalp. Unlike dandruff, hair casts, or product residue, they do not brush or shake off easily. If you’re unsure what you’re seeing, a professional head check can help confirm whether the white specks are viable nits or something else.
Is a metal nit comb better than a plastic one?
Many parents find that a quality metal nit comb with closely spaced teeth is more durable and effective than many plastic combs. However, the overall performance depends on the comb’s design, quality, and condition
How often should I check my child’s hair for lice?
A weekly check is a sensible routine for many families. It’s also a good idea to inspect the hair if your child’s school reports a head lice outbreak or if they begin scratching their scalp frequently.
Does cleaning the comb stop lice from spreading?
Cleaning a nit comb helps maintain good hygiene and reduces the chance of transferring trapped lice or viable nits between uses. However, head lice spread mainly through direct head-to-head contact, not through the comb itself.
Conclusion
Cleaning your nit comb after every use is a simple habit that helps keep it effective for routine hair checks and head lice removal. Regular cleaning, proper storage, and replacing a worn or damaged comb when needed can help maintain its performance for years.
Whether you’re checking your child’s hair as part of your weekly routine or managing an active infestation, using a clean, well-maintained metal lice comb can make combing more effective and help remove live lice and firmly attached nits with greater confidence.
At Bye Nits UAE, we use and recommend the Poux Experts Comb during our professional head lice removal appointments because of its closely spaced stainless steel teeth and durability.
If you’re considering professional removal and want to know what to expect before your appointment, you can learn more about what happens during a professional lice removal in Abu Dhabi.
To learn more about our Head Lice Removal Services, view our pricing, or book an appointment, visit our website or contact our team for advice.
Spot Lice? Act Before They Spread
Early action can make lice removal easier. Get professional help to identify and remove lice and nits before the problem becomes harder to manage.